After a long hiatus induced by the demons that was school, I have finally defeated the final boss and graduated!
With that, I have started to work on re-building my portfolio site (you’re seeing it right now!). I wanted to learn Gatsby.js and so I figured it would be the best time to do so! While working with Gatsby.js, one of the issues that I had faced was not having a proper guide on deploying Gatsby.js applications onto GitHub Pages via GitHub Actions. The official documentation does include a guide on perform Continuous Deployment (CD) via Travis.CI but I wanted to mess around with GitHub Actions - GitHub’s own CI/CD pipeline.
So I decided to experiment with building my own workflow and document my process. It was quite interesting how I got to the current refinement of my CD workflow and I will be sharing a little on the mistakes that I had made and the lessons learnt.
Why Gatsby.js?
Taken directly from Gatsby’s web description…
Gatsby.js is a PWA (Progressive Web App) generator.
It may seem a little odd at first but basically, Gatsby.js is a static site generator built around React. It ties
together various React plugins - like react-router and webpack - to create a seamless development experience when
creating static sites.
A static site is a site where a framework is used but the library generates the resulting HTML/CSS/JS files. In doing so, the site is far more performant than dynamic sites that take time to execute the code of the framework. Gatsby.js performs all the execution when creating a bundle and we simply deploy this bundle to GitHub pages or any web hosting platform to have our site up and running.
In a future post, I will be covering the merits of a static site generator - specifically Gatsby.js - but for now, let’s move on to our next tool, GitHub Pages!
Why GitHub Pages?
GitHub pages is…
GitHub Pages is a static site hosting service that takes HTML, CSS, and JavaScript files straight from a repository on GitHub, optionally runs the files through a build process, and publishes a website.
(Definition taken from here)
I would like to focus on these four hyper-critical words: “static site hosting service”. Recall when I mentioned that Gatsby.js is a static site generator? These four words are like music to my ears! It means that once we have generated that bundle with Gatsby.js, we can use GitHub Pages to host our website!
This is awesome because I needed a cheap (if not nothing) hosting provider to host my portfolio website. GitHub Pages will deploy the site directly from a GitHub repository, providing seamless integration and it is super userful for creating documentation sites for your projects!
A big perk to using GitHub Pages is that you can have a user page. This is created from a repository that follows
this naming pattern: <GitHub username>.github.io. When using a user page, you will receive access to the .github.io
domain. This is useful for portfolio sites as it now means that we are able to deploy our portfolio page and have a
domain name like woojiahao.github.io!
You can find out more about GitHub pages here and more about user pages here.
Why GitHub Actions?
Finally, we have the star of the evening - GitHub Actions!
GitHub Actions makes it easy to automate all your software workflows, now with world-class CI/CD. Build, test, and deploy your code right from GitHub.
(Definition taken from here)
GitHub Actions allows us to develop CI/CD workflows that integrates directly with GitHub. For our use case, we can use the default tier.
I picked GitHub Actions primarily because I was intrigued by it and wanted to give it a spin. I had adopted it when working on torrent.go (a BitTorrent protocol implementation written with Go!) and found that it was rather unique in its approach so I wanted to test it out even more.
Chief! What is our plan of attack?
First, I would like to discuss the final strategy that I took to deploy my portfolio site to GitHub pages.
To begin, we need to outline the strict limitation of user sites…
If the repository for your user or organization site has a master branch, your site will publish automatically from that branch. You cannot choose a different publishing source for user or organization sites.
This means that for our site, if we are using woojiahao.github.io, we MUST publish the site to the master branch.
Our CD workflow looks a little like this:
We push our latest changes in Gatsby.js (including new blog posts, project listings, or just site changes) to a
developbranchAs we may have multiple sets of changes that we push at different times, we do not want our site to be deployed immediately. Instead, we move on to step dos!
We will merge the changes into a
publishbranch. On merge, we should automatically deploy our application.Now this is where it gets tricky, we need to build our Gatsby.js page - to create the bundle - and set the contents of this bundle to the contents of the
masterbranch.
This is where you can see our consideration of the limitation mentioned above take effect. However, by setting
the master branch to be a “dump” for the bundle files, it would be hard for us to navigate our GitHub repository. This
is why we need to properly setup our branches to allow for this peculiar workflow!
Go, go, go!
Let’s dive right into the configurations.
Setting up branching
The first order of business is to properly setup our branching strategy. We will use a mix of both the GitHub UI and the Git CLI. So if you have not installed the Git CLI, you can do so here.
As mentioned in our workflow, we will be using three branches:
master- to hold the build bundle and renders the pagedevelop- pseudo-master branch that we will use to host our changes in Gatsby.jspublish- merge-only branch that we use to trigger a deployment
So, let’s first create and push the other two branches.
| |
So we checkout the develop branch before the publish branch since we want the publish branch to be based on the
latest changes of the develop branch. Don’t worry, however, we will only be needing to checkout the publish branch
via the Git CLI only once to configure.
We push and set the develop branch to be
our tracking branch as from now on, we want to
permanently push to the remote develop branch.
We also push the publish branch to create the remote branch.
If you go to the repository in GitHub and expand the “Branch” dropdown, you should see that there will be three branches now.
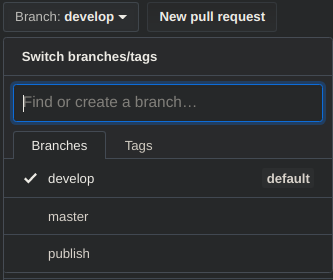
Once done, we can now continue our branching configurations in the GitHub UI.
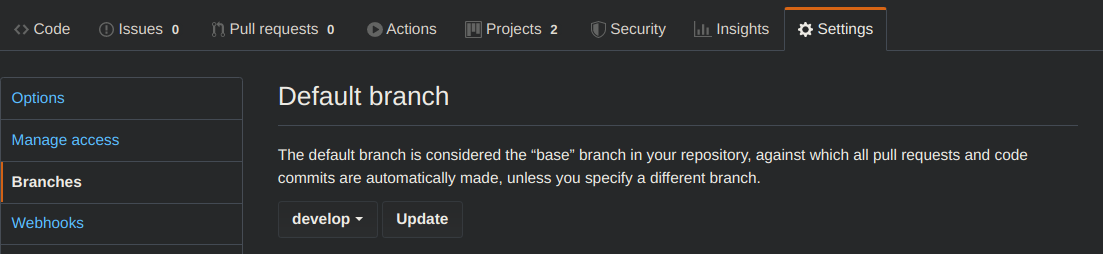
Under “Settings > Branches”, there is an option for the “Default branch”. Normally, it is the master branch. However,
as mentioned earlier, we want to be able to view and access our repository easily (and have the all-so-important
language colors be right!). So, we will change the default branch to be develop.
Once we have configured these two aspects, we are done with our branching strategy! Let’s move on to the real meat of this CD - the workflow!
Creating the workflow
GitHub Actions will look out for workflows in our repository to determine what actions are to be run. These
workflows are stored in the .github/workflows folder.
We can just name our CD workflow as deploy.yml. Yes, these workflow files are declared as YAML documents - like Docker
Compose!
/
|_.github/
  |_workflows/
    |_deploy.yml
Then, we can start to configure our workflow. Fire up your favourite text editor and let’s begin!
The first thing we will configure is when this workflow will run. As mentioned earlier, we want to deploy our site only
when we push to the publish branch via a merge, thus, we will have the following:
| |
Then, we can start declaring our jobs aka the thing that runs. GitHub Actions allows us to configure concurrent jobs or jobs that rely on one another, but I will not be going into detail about those in this post. If you want more information, please refer to the documentation here.
This workflow will only require one job and we can call it deploy.
| |
We then specify what is the underlying OS the CD will use to execute this workflow.
| |
Then we declare strategies. From my understanding, these are variables that we can use and we can declare them as arrays to allow us to execute the workflow on multiple versions of Node for instance.
However, in our case, we can make do with just having one version of Node since we are building once. If you require more details about strategies in GitHub Actions, refer here.
| |
Finally, we can declare our steps for the workflow.
| |
First, checkout the repository so that our workflow can access it.
| |
Then, we setup Node in out Ubuntu machine. We use the node_version we declared in our strategy.
| |
Then, we install gatsby-cli and the necessary dependencies for our static site to be generated.
| |
Then, we set the Git credentials as we are using the gh-pages npm package to deploy our site. I will explain further
later on.
| |
Lastly, we can build the site bundle and deploy it. I have used a custom script declared in the package.json and a
GitHub token, both of which I will be discussing below.
| |
There it is. We have created the workflow for deploying our application. However, we have some missing components that we have yet to configure so buckle up for our last set of configurations.
A sample of the whole workflow file looks like this:
| |
Creating a deploy script
We are using the gh-pages to automatically push the build bundle to the master branch. We will need to setup
a deploy script in our package.json to use this package. This script will build the bundle and deploy it to
the master branch.
| |
I would like to focus in on the command for gh-pages.
gh-pages -d public -b master -r ...
-d indicates which folder the build bundle is located. In Gatsby.js case, it is the public/ folder.
-b indicates which branch we will push the build bundle to. By default, it is the gh-pages branch. But as I have
explained, we need it to be the master branch.
-r indicates the GitHub repsitory we will be pushing too. This uses the GH_TOKEN environment variable that we have
loaded into the workflow. It also leads us nicely to the next and final configuration we need to perform - getting a
GitHub access token.
Shhh! … (Access tokens and secrets)
The last ingredient to this workflow recipe is a GitHub access token.
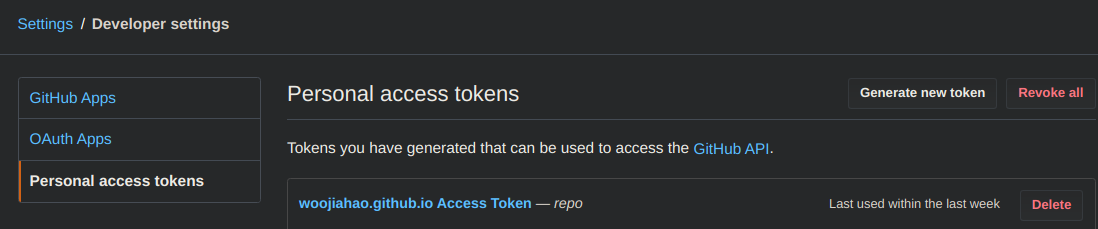
We can generate a personal access token under “Settings > Developer settings > Personal access tokens > Generate new token”.
When generating the token, restrict the token’s scope to repo only.
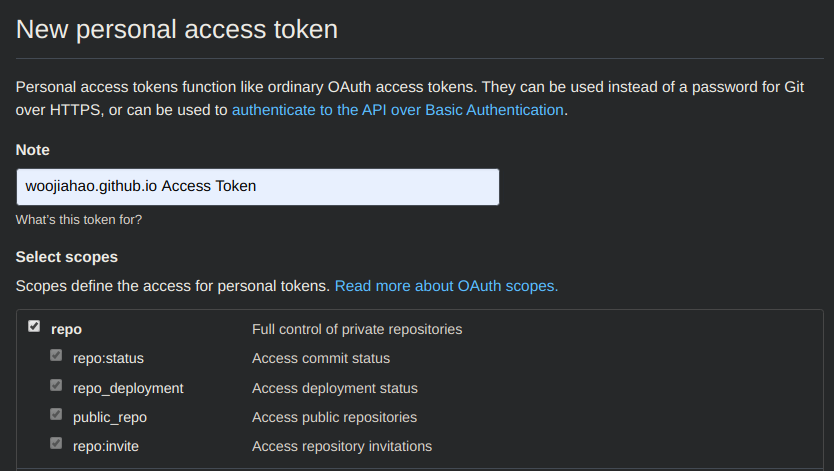
You will receive a token once you create it. Copy this token to your clipboard and save it somewhere secure.
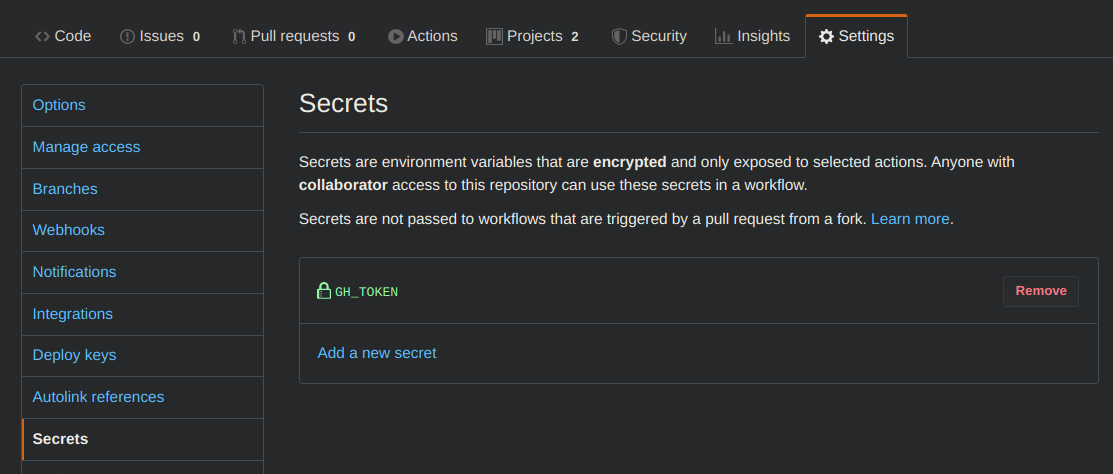
Then, go to the Gatsby.js repository and under “Settings > Secrets”, select “Add a new secret”. The name of the secret
must be GH_TOKEN and the value is the copied token.
For more information about personal access tokens and GitHub secrets in GitHub Actions, you can check these links out: access tokens and secrets.
And we are done! This was all the configuration we needed to get the CD workflow working!
IT WORKS!!
We can test whether the workflow works by making a merge request from develop to publish. When we accept the merge
request, it will push the changes to the publish branch and in turn, trigger the workflow and deploy our site.
Now, just sit back and enjoy as the deployment happens automatically.
Mistakes were made…
While experimenting with GitHub Actions, I had several “duh” moments.
YAML disaster
When I was writing the first iteration of the workflow file, I failed to read the documentation for GitHub secrets and had incorrectly set the environment variable.
FYI, environment variables should be declared like this
| |
and not like this
| |
Because I had declared it improperly, I was not able to access the GH_TOKEN token in my workflow and it caused the
workflow to fail. It took me a while to realise what I had done.
Repository takeover!
When I was first designing my workflow, I had actually completely forgotten that there were branches outside
of developer and master. Originally, I had created a completely separate repository to house my development code.
This left the original repository to be a hosting platform for the build bundle.
It took me a while to realise how impractical and unnecessary this was and I re-designed the workflow.
Conclusion
Overall, this was an interesting journey! I learnt a fair bit about Gatsby.js and GitHub Actions along the way. If you wish to view the Gatsby.js project I use for my portfolio site, you can visit it here